You’re ready for WordPress.
Domain name? Check. Website hosting? Check.
But what comes next?
While the WordPress platform is infinite in its potential, the endless choices and complexities often baffle the savviest of tech users.
Don’t fear. We wrote this post to help you set up your WordPress site from scratch. By the end of this quick read, you’ll be creating content, customizing your site, and ready for anything to do with WordPress.
Follow these 5 steps to get your WordPress up and running in no time.
#1 Install WordPress
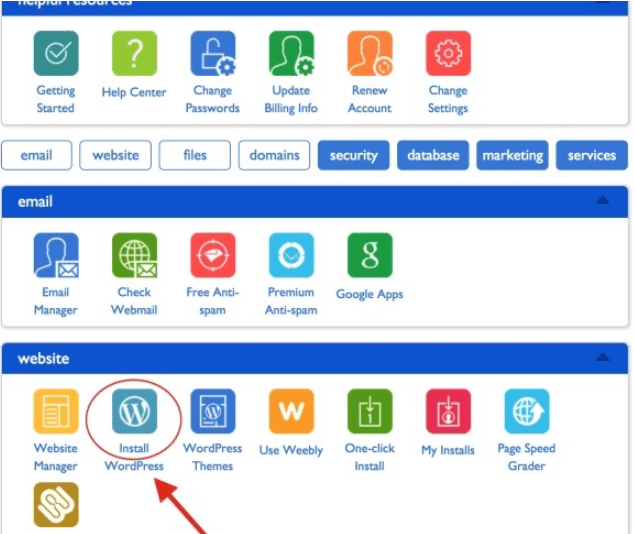
Every hosting service offers one-click installing for WordPress.
- To start your one-click WordPress install, log in to your hosting account.
- Go to the Control dashboard and look for the icon labeled WordPress or Website.
- Select the domain name you want to install. You can always change this later.
- Click Install Now.
The screen will display a selection of templates you can apply to your site. You can ignore this, as we’re about to cover how to install your own custom theme or template. - You can now head to the WordPress log-in page. Your website URL will we displayed as the following: http://www.yourdomain.com/wp-admin
- To log in, use the admin username and password you had used earlier.
#2 Choose your theme
(Source)
Now it’s time to select your site layout. WordPress themes are professionally designed templates that change the appearance of your site to suit your needs.
Thousands of site designs are available to choose and customize from within the WordPress dashboard.
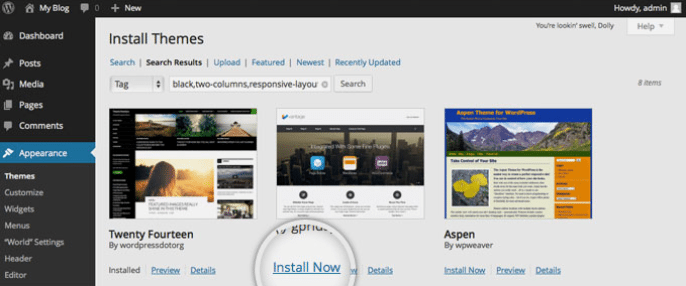
- To pick a theme, log in to your WordPress dashboard.
- Scroll down the sidebar and click Appearance > Themes.
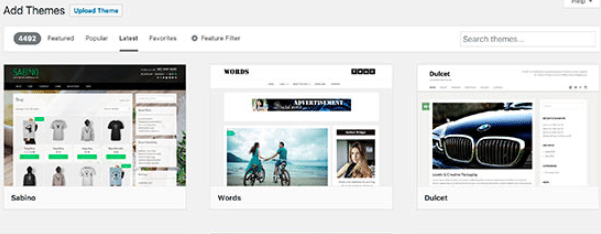
(Source) - You’ll be presented with a library of 4,492 free themes, so browse until you find a design you like. If you’d prefer something more elaborate, check out Themeforest.net for additional themes at a small price.
- Once you’ve found the theme for you, simply click Install > Activate.
- You can customize your theme by clicking the Customize tab under the Appearance menu.
- Adjust your font, font size, spacing, link colors – any visual element within your theme.
Note: You needn’t worry that changing themes will erase your content. It won’t. However, you should update your themes regularly to secure your site from cyber attacks and keep it optimized for site speed. For a hands-off way to update your theme, turn to a WordPress concierge service.
#3 Add content to your WordPress
Two types of content exist on WordPress: pages and posts.
Posts are part of your blog.
By default, they are set to appear on the front page of your website in reverse-chronological order. You can create a separate section for your blog or have no blog at all. The next section will show you how to change these settings.
Pages are “one-off” content separated from each other, such as your product page, about page, and so on.
Let’s start by creating a page.
- To create a page, go to Pages in the WordPress admin area and click Add New. The system will display the following screen:
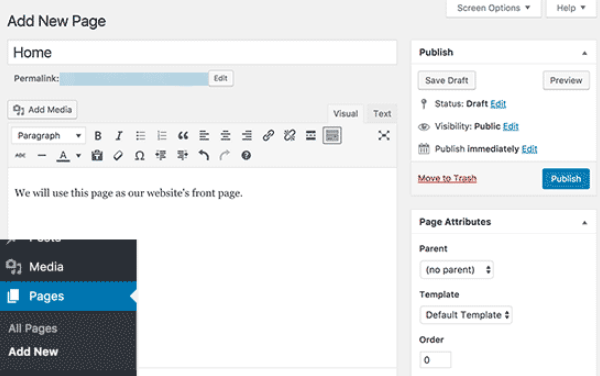
(Source) - We’ve started by naming our page “Home.”
- Next, we can add images, text, links, embed videos, audio – anything really – from the menu above. Once you’ve completed a page as you like, click the Publish button. Now the page is live on your site.
- Repeat this process until you’re satisfied with your website sections.
Now let’s make a blog post.
- Select Posts from the WP admin sidebar, scrolling to Add New.
- You’ll see a screen similar to the Pages section. Extra options such as categories, tags, and post formats are available for organizing your blog posts.
- Once you’ve created a blog post, click Publish. The blog post is now live in your blog section.
#4 Customize your WordPress site
(Source)
With some content ready to go, let’s perfect the layout and presentation of our WordPress site.
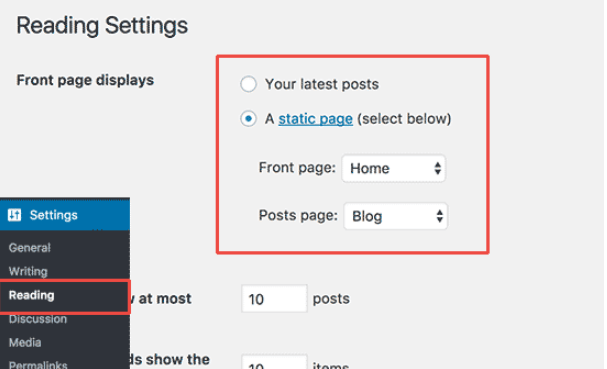
- First, let’s establish a static front page instead of greeting our home page visitors with a blog-roll.
- Go to Settings and click Reading within the admin area. You’ll see Front Page Displays, so select the static page option and choose from one of the pages you previously created.
Remember: Always click Save Changes after you’re done with an edit.
Great, our home page is set.
What’s next?
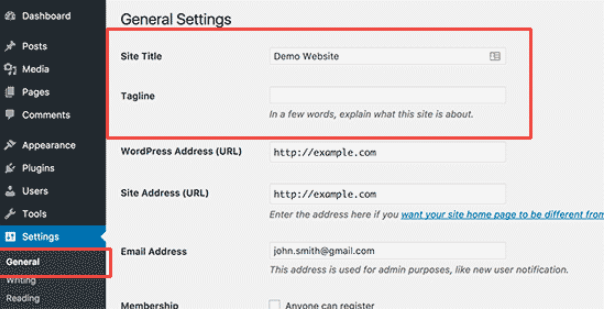
Site title and tagline.
(Source)
This is where you’ll name your site and choose the tagline visitors will see in search results.
- Find this section by going to Settings > General. Keep the tagline short and describe the main idea of your site to pull readers into your WordPress.
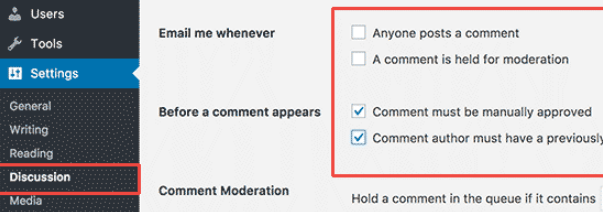
Next, setting up comments.
(Source)
WordPress allows you to both receive and respond to comments on your site. The aim here is to increase engagement on the site will cutting down on any spammers or trolls.
- Go to Settings and then Discussions.
- Establish the protocol around with comments to appear on your site and how involved you’ll be in regulating them.
Lastly, let’s arrange the site navigation menu.
The site navigation menu has buttons which help your visitors find content on your site. For example, users could click Blog, About Us, or Services.
- Visit Appearance and then Menus from the admin menu at left. Name your navigation menu and then click Create Menu.
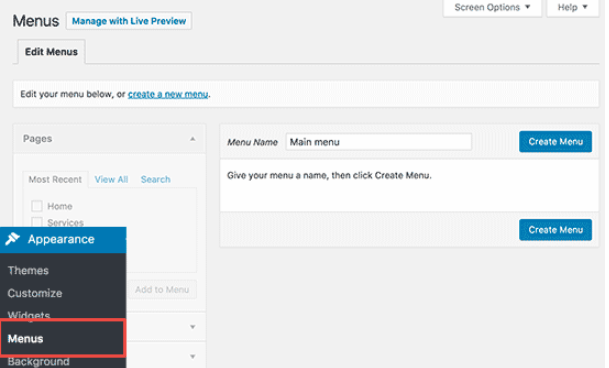
(Source) - Your menu now exists, but it’s empty. To fill it, you’ll need to select the pages that you want to display in the menu. From the Pages section at left, click on pages that you want to display and then click the Add to Menu button.
These pages will now populate your formerly empty navigation area, where you can rearrange them as you like.
#5 Install Plugins
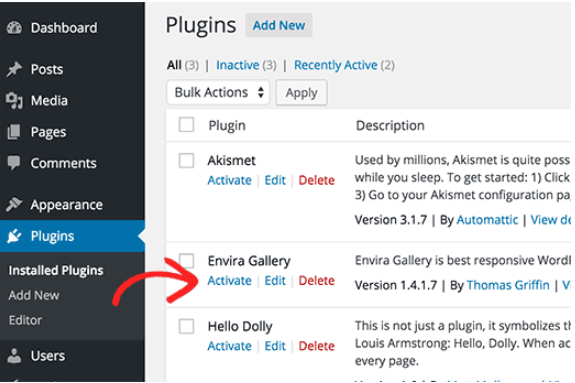
(Source)
WordPress uses plugins like phones use apps. Download plugins to add features to your site, such as photo galleries, email capture forms, or social media integration.
These allow you to offer a rich user experience and ensure a fully functional site. Most of the nearly 50,000 plugins available via WordPress are free, though many paid plugins exist as well.
- To download plugins, go to the Plugins section of the WP admin area.
- Browse the selection of plugins, then click the Install Now button. Now you can enjoy the added site features!
Plugins must be installed but also updated routinely. Since 70% of WordPress hacking threats result from non-updated plugins, prioritize your plugin maintenance to safeguard against cybercrime.
Congratulations, you’re ready for WordPress!
You’re now an authority on how to set up your own WordPress website.
From installation to plugin maintenance, these five steps are all you need to operate your own website from anywhere. While the setup might seem a “set it and forget it” solution, the incredible flexibility of WP does necessitate routine maintenance.
To guarantee your best SEO rankings and fastest page-load speeds, update your plugins and themes as soon as new versions become available.
Failing to stay current compromises your user experience and exposes you the security breaches. If you’re not keen on site maintenance, turn to your friendly WordPress concierge service for everyday assistance and 24/7 security.
Sources:
https://theblogpress.com/blog/setting-up-menus-and-navigation/
https://colorlib.com/wp/how-to-make-a-website/
https://websitesetup.org/
http://www.wpbeginner.com/guides/